API Postman collection
The Packeta API Postman collection contains ready-to-use examples of the most common API requests. It allows you to test API flows directly in Postman without writing any application code.
Collection structure
The collection is divided into folders based on the specific delivery options. Each folder contains the step-by-step flow. For example: <createPacket> → <packetCourierNumber> → <packetCourierLabel> for creating a home delivery packet.
Request data is sent in the XML body, not via headers or query parameters. Each request therefore contains a prepared XML example in the Body section. You can adjust the input values based on your use case. The Docs tab contains links to the online documentation.
In the Scripts tab we have prepared predefined automations:
- packet ID and courier number are automatically saved into variables
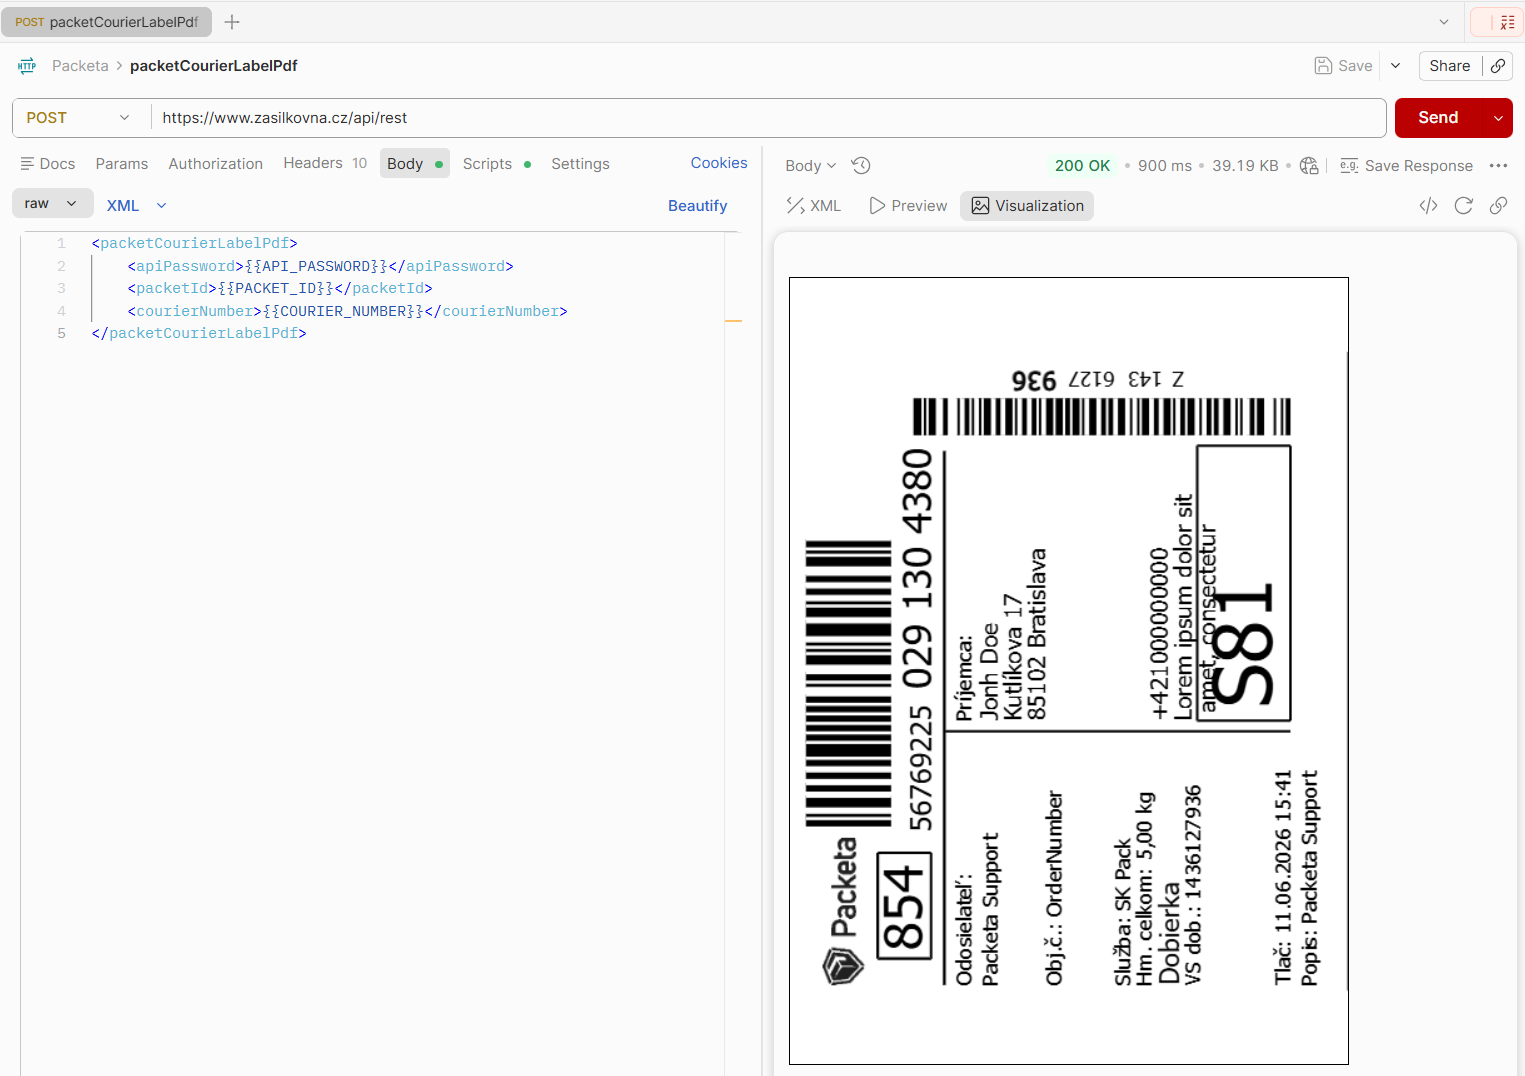
- labels can be previewed via Visualization
Before you start
Make sure you have the following ready:
- Postman account — sign up at Postman.
- Approved account in client section
- API credentials from the client section:
- API_KEY — 16 characters
- API_PASSWORD — 32 characters
- SENDER_INDICATION - from client section
Fork the collection
Forking creates your own editable copy of the official Packeta API collection, so you can experiment without affecting the original.
- Click:

- Once in postman, choose Fork collection
- Select a name, workspace and confirm by clicking Fork collection
The Packeta API collection now appears in your workspace under Collections in the sidebar.
Configure your API credentials
Before sending requests, fill in your API credentials and your sender indication in the Variables tab.
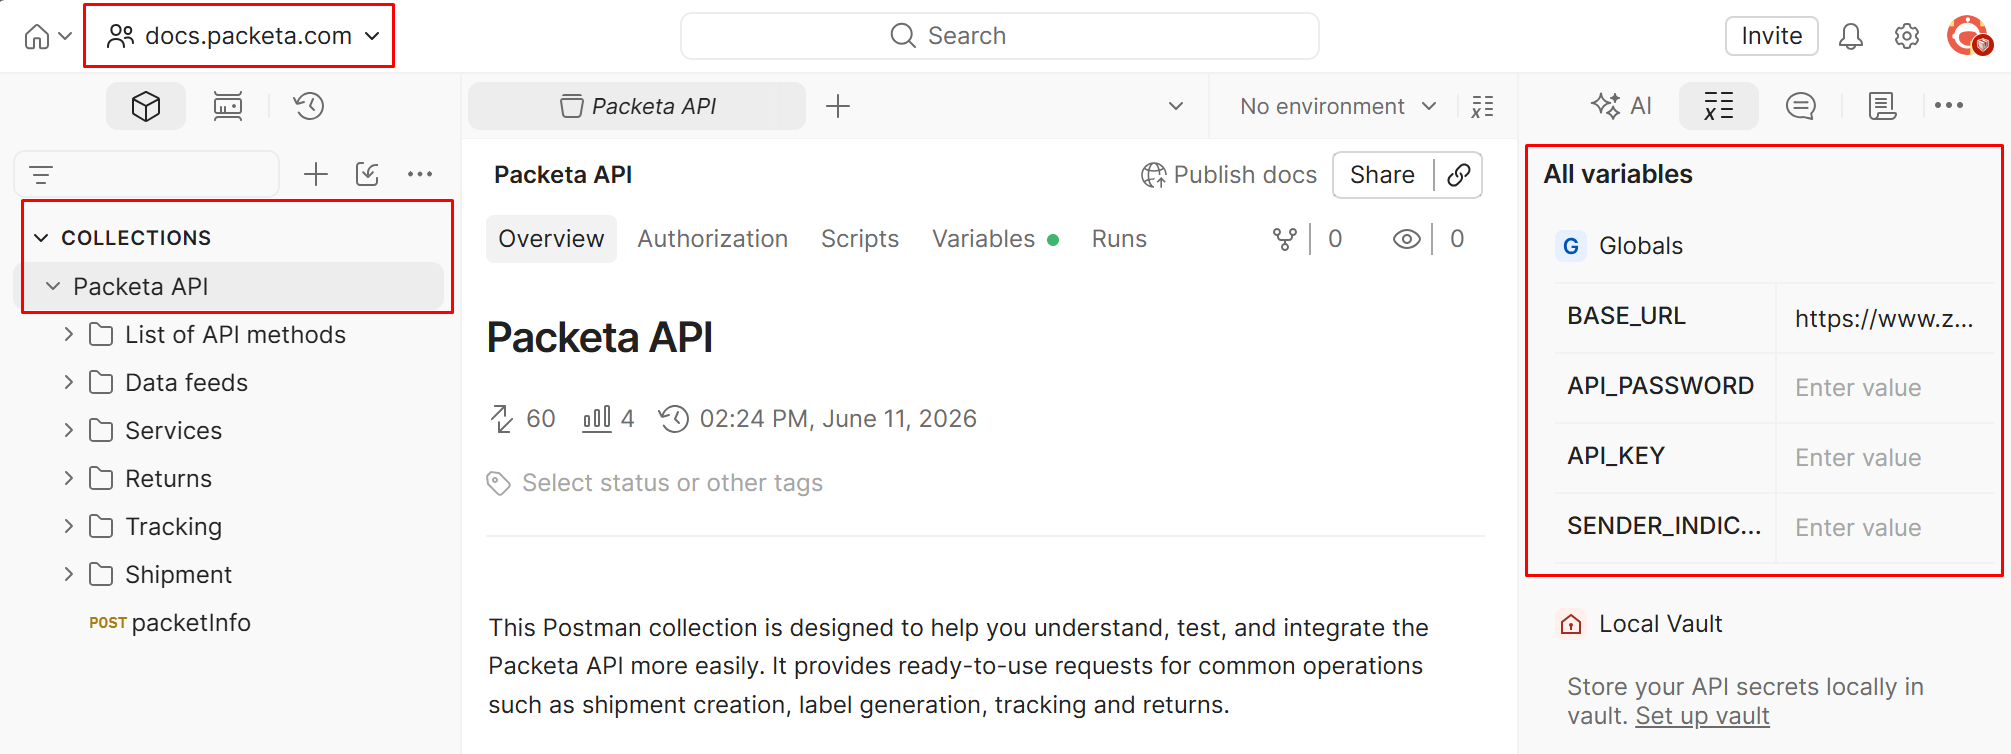
Keep your API credentials private. Do not share your fork or workspace publicly with the values filled in.
Working with the collection
The example below demonstrates how to create a home delivery packet to Slovakia.
Send request
Go to Services → HD - Home delivery → Create packet - HD → Body.
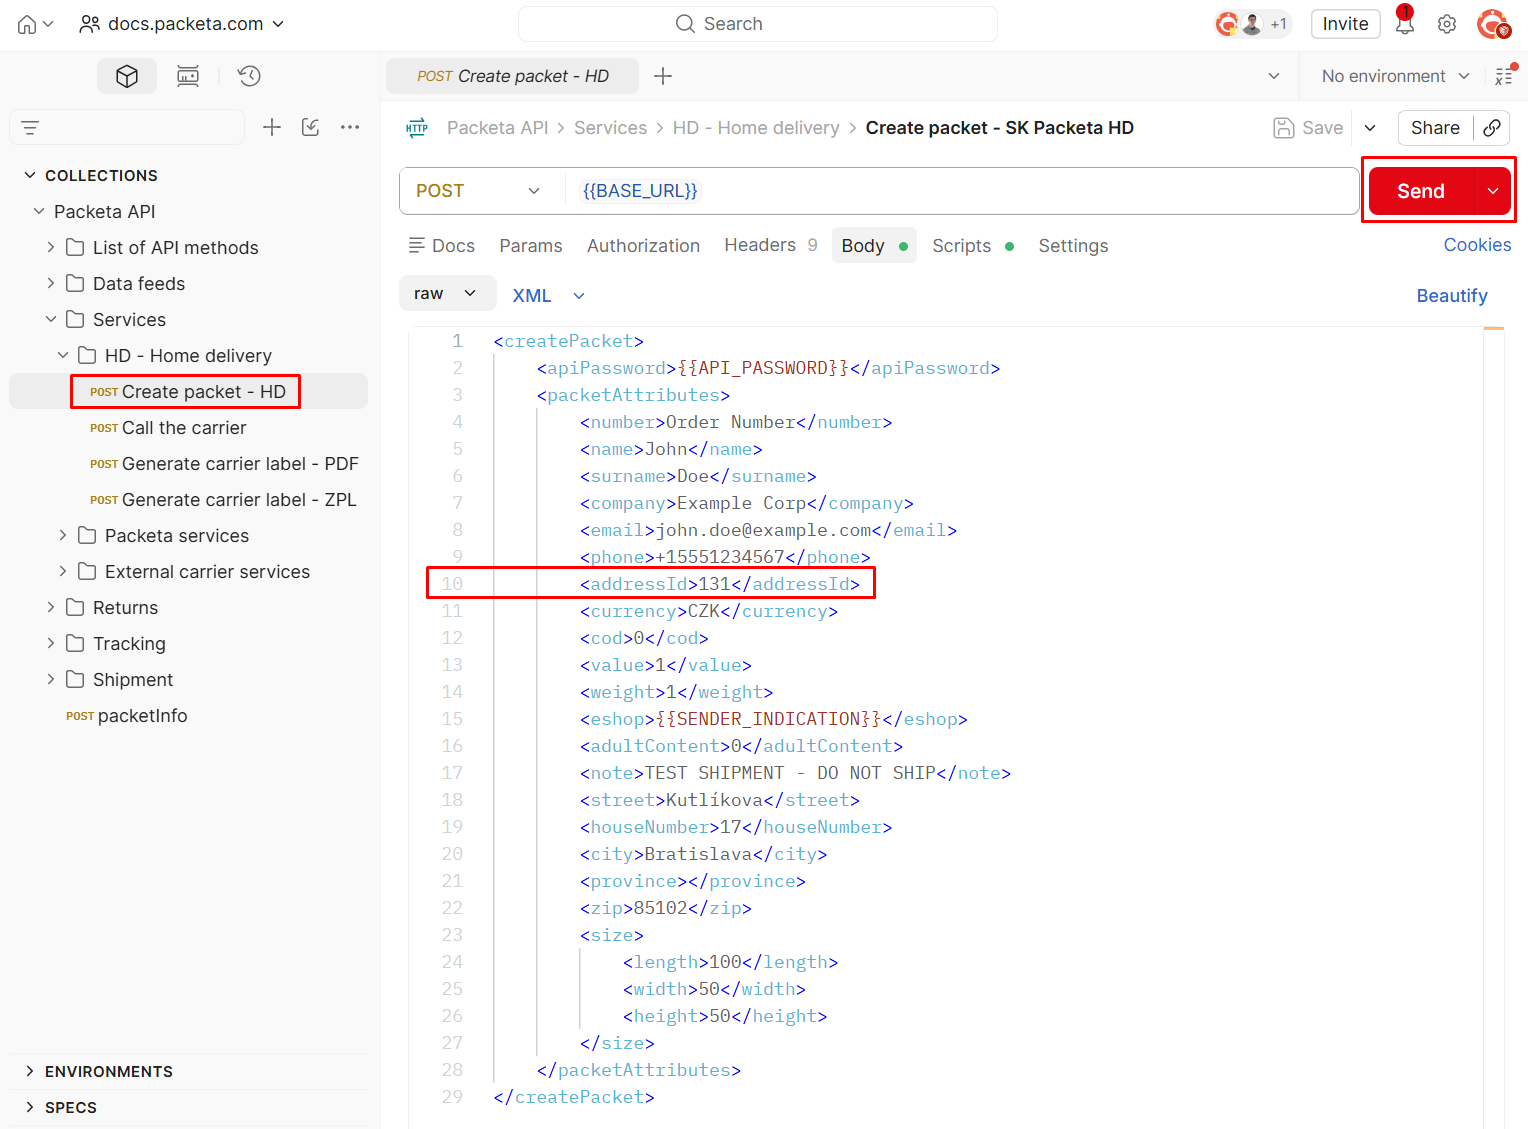
Update the value in <addressId> to 131 (SK home delivery HD carrier ID). Fill in the required fields like email and address accordingly, then click Send.
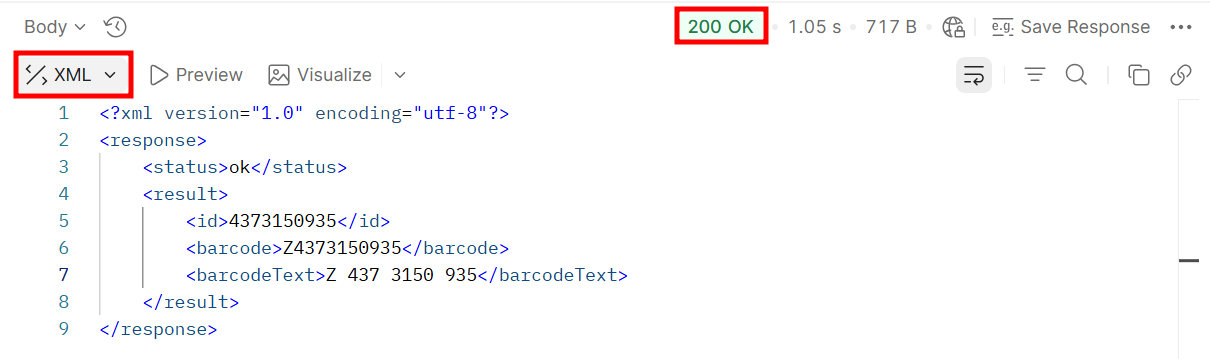
Successful response
Successful response shows status 200 OK. The response body includes the identifier of the packet in the <barcode> element. This value is automatically saved into the packetId variable, allowing you to immediately use follow-up requests.
Get courier number
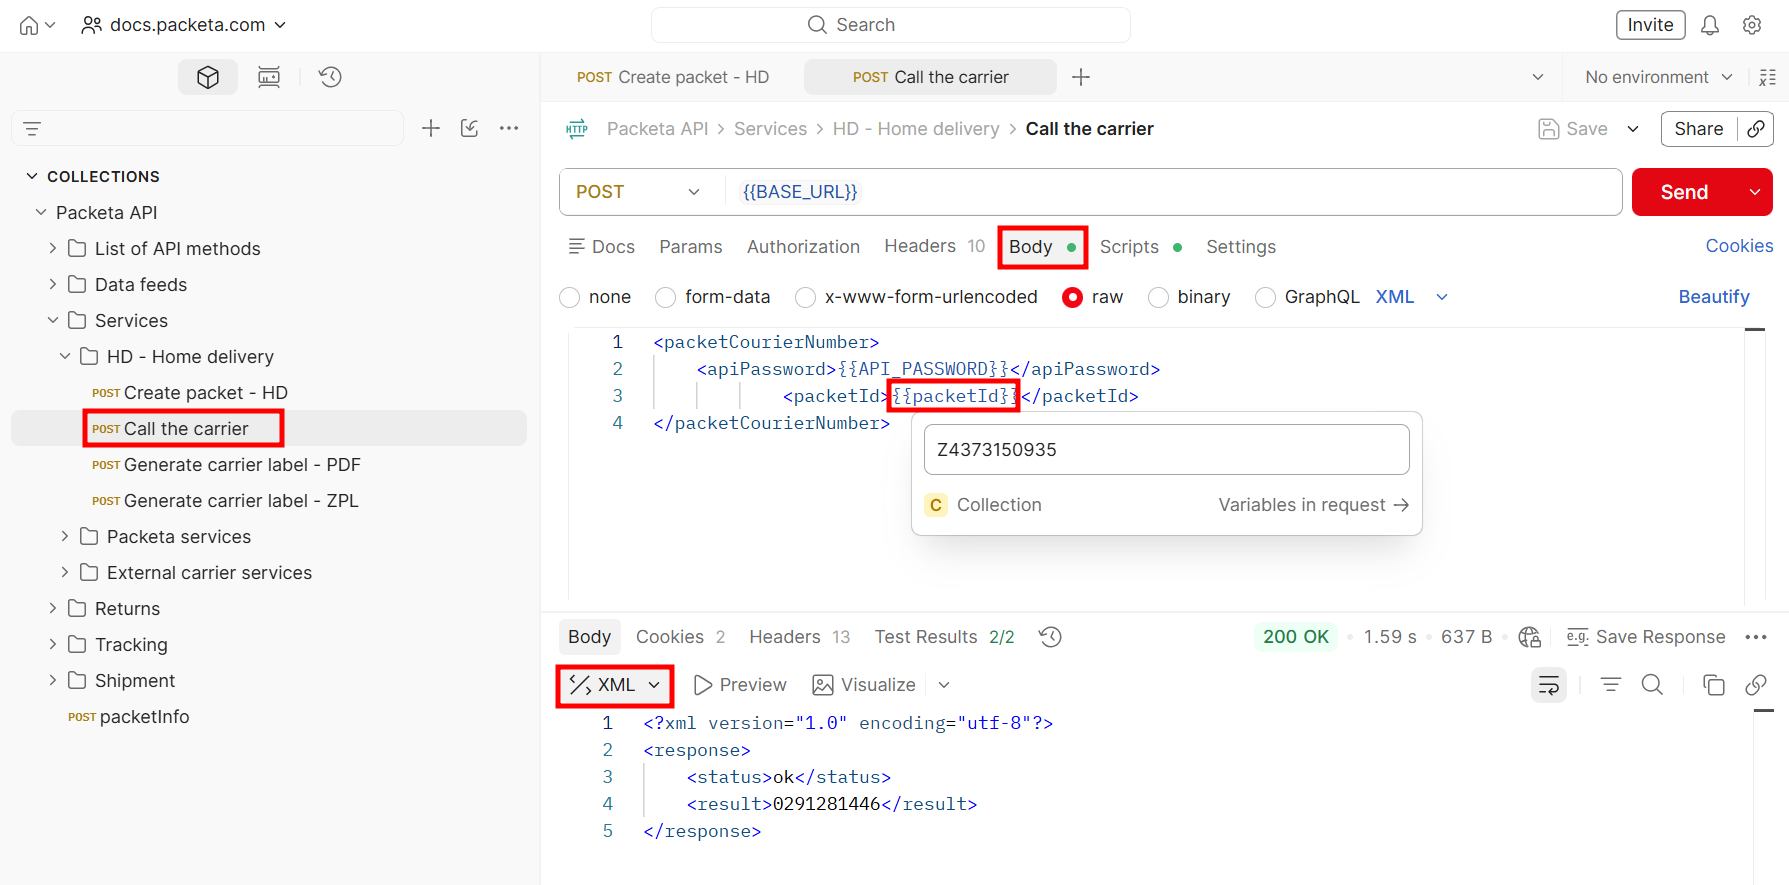
In the same folder, open Get courier number and click Send. The request uses the saved packetId variable automatically.
The response contains the courier number required for label generation. This value is stored in the courierNumber variable.
Generate carrier label
Open the Generate carrier label - PDF / ZPL and click Send. All required values are prefilled in via variables. View the generated label in the Visualization tab.
You can explore other folders in the collection in the same way.